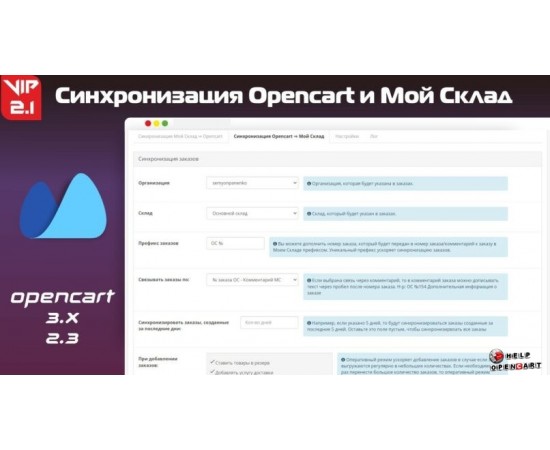
Synchronization of OpenCart and my warehouse v2.4
Download-Synchronization of OpenCart and my warehouse v2.4
Description
Updated to version 2.4 Updated My Warehouse API
The OpenCart and My Warehouse synchronization add-on v2.4 is designed to automatically synchronize inventory, orders and customers between the OpenCart online store and the My Warehouse warehouse management system. This add-on ensures the smooth operation of your online store and simplifies the process of managing orders and inventory. The main features of the add-on include: - Automatic inventory synchronization between OpenCart and My Warehouse; - Automatic synchronization of orders between OpenCart and My Warehouse; - Automatic synchronization of clients between OpenCart and My Warehouse; - Supports multiple currencies and units of measurement; - Ability to choose which products to synchronize; - Ability to adjust the synchronization frequency. Addition Synchronization of OpenCart and my warehouse v2.4 is an indispensable tool for a modern online store, which can significantly simplify the processes of managing orders and inventory, as well as improve the quality of customer service.
This module allows you to transfer products and categories from the My Warehouse service to OpenCart, OcStore, as well as orders from OpenCart, OcStore to My Warehouse
The module allows you to do the following
Transfer products and categories from My Warehouse to OpenCart, OcStore
Update information about products (price, quantity, description, category, meta tags, weight, manufacturer, url, article, status if out of stock) and categories (parent category, meta tags)
Transfer several product images from My Warehouse to OpenCart, OcStore at once
Transfer options and attributes (modifications) from My Warehouse to OpenCart, OcStore
Transfer orders from OpenCart, OcStore to My Warehouse
Perform all of the above actions automatically via Cron (task scheduler)
Information about the module operation
Module name in OpenCart, OcStore: Synchronization with My Warehouse
Data exchange occurs via the My Warehouse API (JSON API 1.2)
The module is open source
To link products, the following fields are used: Code/Article/External code or for a more strict link: Names + fields Code/Article/External code (in the first case, the selected field must be unique for all products in My Warehouse, in the second case there should be no products with the same name and selected field). In OpenCart, OcStore there should also not be products with the same communication fields (model/sku or name + model/sku)
To link modifications (attributes and options), only their Names are used, so the names must be unique
After any changes to the module settings, you must save them
To synchronize the attributes of modifications in My Warehouse, the description must say “Attribute” (without quotes)
Options loaded through the module are not linked, so you can select any combination of options
If there are a large number of entities: products, modifications, orders, categories (more than 10,000), due to long synchronization (adding/updating), a 504 Gateway Time Out error may occur if the hosting has a limit on the execution time of scripts. In this case, you need to contact hosting technical support with a request to increase the max_execution_time value for php (maximum script execution time) or do it yourself.

Installation
Installation of this module occurs through the “Install extensions” function in OpenCart, OcStore. All that is required is to click on “Upload file” and select the archive with the module (archive with the extension ocmod.zip)
Update
To update the module version, just download the archive with the new version through the add-on installer, all settings will be saved. After updating the version, be sure to save the module settings so that everything is updated correctly.
Working with the module
Entering data from My Warehouse (login and password or access token, which is generated in the My Warehouse settings)
Selecting module settings (selecting the type of product connection, fields for synchronizing products, sales price, etc.)
You can perform synchronization: 1) manually (by clicking on the buttons to add/update) or 2) automatically (by adding commands for the Cron scheduler and setting the execution period)
Working with Cron (automatic synchronization)
1. Go to the crons tab on your hosting
2. Click “add command”
3. Paste the command for cron from the module
4. Select the command execution interval
5. Save the command
Repeat the steps below for all required commands
Specifications
| Add-ons and extensions | |
| Совместимость | 2,3 - 3,0,3 |


